Saturday, December 31, 2011

Party Taco Dip

Deciding what food to bring to a party is always a difficult choice for me.  I like to plan well in advance so I have time to shop and prepare the food as early as possible.  Sometimes I am forced (either through my lack of planning or just plain laziness) to prepare something at the last minute.

For the New Year's Eve party that I'm attending this year, I had decided to bring taco dip and tortilla chips.  Most of the ingredients, I normally have on hand, but I needed to pick up a couple things.  So I foolishly ran to the supermarket this afternoon (New Year's Eve).  As I approached the parking lot, I said, "NO!"  That was because I couldn't even turn into the parking lot with the amount of traffic waiting to enter.  There wasn't an empty parking space to be had, so I waited as patiently as I could and drove in and out of the parking lot to promptly return home.  Some cream cheese and tortilla chips were simply not worth the hassle.

Onto plan B...  I would bake my own tortilla chips using the tortilla shells at home and I would substitute sour cream for cream cheese.  I probably should have done that in the first place; lesson learned.

I returned home and starting baking tortilla chips while I prepared the taco dip to accompany them.  Crisis averted :-)  Here is the Taco Dip recipe you can whip up in a snap.  The home made tortilla chips recipe is found in an earlier post under "Homemade Chips and Salsa"

Have a happy and healthy new year!

PARTY TACO DIP

Ingredients:
1 tablespoon Auntie Jean's Low Sodium Taco Blend*
8 ounces low fat cream cheese / neufchatel, softened
1/4 cup low fat sour cream / yogurt
1 bag lettuce
2 diced tomatoes
1/4 cup diced red onion
1/4 cup diced green onion
1/2 cup shredded cheddar cheese
sliced black olives (optional)

Preparation:
In small bowl, combine cream cheese, sour cream, and taco seasoning. 

Spread onto bottom of shallow dish.

 Layer lettuce, tomatoes, red onion, and green onion. 

Top with shredded cheese. 

Refrigerate at least one hour.  Serve with tortilla chips.

*To purchase Auntie Jean's Low Sodium Taco Blend, email me at:  auntiejeans@yahoo.com


Wednesday, December 28, 2011

Ultimate Potato Soup

It's the time of year to eat more soup.  Soup warms you up when you've been outside shoveling snow and it helps to heal those winter colds.  I love to eat soup year round, but I rarely eat soup from a can because those canned soups normally contain the most sodium of any food.  Even the reduced sodium varieties contain over 500 mg per serving.  That is about 1/3 of my sodium intake for the day, so I'd prefer not to use it on average tasting soup.

My family loves potatoes; while I don't love them, I do eat them because they are rich in heart healthy potassium.  I use a potato soup recipe that is low in sodium and fat.  Somehow even without all the sodium and fat, the recipe still manages to be delicious.  I have to say that the recipe is rather time consuming; it's difficult to make the soup while making dinner.  The easiest way to serve it with dinner is to prepare it the night before and leave it in the refrigerator overnight.  Simply reheat it with dinner.  Please note that potato soup does not freeze well.

Here is the recipe with notes:

ULTIMATE POTATO SOUP

Ingredients:
4 potatoes, diced
1/2 cup celery, diced
1/2 cup chopped onion
3 cups low sodium chicken broth  (I use Herb-ox sodium free instant broth)
2 cups half & half / milk (I usually use skim milk)
2 cups water
2 tablespoons butter, melted
2 tablespoons flour
2 cubes chicken bouillon (I also use Herb-ox sodium free cubes)
1/4 teaspoon black pepper
1/4 teaspoon garlic powder

Preparation:
In a large pot, bring potatoes, celery, and onion to a boil in 3 cups of broth.  Cook about 15 minutes, until potatoes are tender. 

Drain and reserve liquid.  Combine reserved liquid and half & half in large pot over medium heat.  In small bowl, combine melted butter and flour then stir into half & half mixture until blended. 

Add bouillon cubes and stir until thickened.  Stir in reserved vegetables, water (if you like a thicker soup, add less water or none at all), pepper and garlic powder.  Heat through and serve.  If desired, garnish with bacon bits.*  Yield 6 servings.


*Note: I use Tastefully Simple Bacon Bacon with less fat and sodium than real bacon bits.

Tuesday, December 20, 2011

Pierogis

Keeping with my family's Christmas tradition, my sister, Karen and I made pierogis this week that will be served for Christmas dinner.  I'm not sure how I learned to make them; I believe that I found a recipe and followed it.  My grandmother used to make pierogis for Christmas, but she never taught me.  My Irish mother is not an adverturous cook to say the least, so she would never even attempt to make pierogis.  My entire family loves eating pierogis, so someone has to make them.

This year we made two kinds: potato and beef.  We also made gluten free versions of them because my cousin is gluten free.  It was the first time that I've tried making them, and they turned out just fine.  You just have to be a little more careful with the dough.  If you are on a gluten free diet, give it a try.  We also made the pierogis in different shapes to we could tell them apart.

Gluten free triangle:

Beef rectangles:
Semi circle potato pierogis:

To make the cooking easier, we made the fillings one day and assembled and boiled the pierogis another day.  Then we froze the boiled pierogis in plastic zip bags.  On Christmas day, we will sautee the pierogis for dinner.

For the potato filling, we basically made mashed potatoes.  You may add whatever seasonings you like to them.  I prefer garlic and black pepper.

Here is the beef recipe.  You may use any kind of meat or meat mixture you prefer.  In  Poland, the most popular filling is pork.


MEAT FILLING FOR PIEROGIS 

Ingredients:

1 pound ground meat

2 tablespoons butter or margarine

1 medium onion, chopped

2 eggs, beaten

½ teaspoon black pepper

½ teaspoon garlic powder 

Preparation:

If desired, you may use a grinder or food processor to process meat.  Do not puree or process too fine. 

 Melt butter in large skillet.  Add onion; sauté over medium heat until tender. 

Stir in meat and eggs. 

Sautee mixture over medium heat about 5 minutes.  Add pepper and garlic powder. 

Let cool.  Makes enough to fill about 40 to 45 pierogis.

Here is the pierogi recipe:
PIEROGIES 
Ingredients:
Pierogi filling
4 cups all purpose flour
2 eggs
5 tablespoons low fat sour cream
6 tablespoons vegetable oil
About ¾ cup water 
Preparation:
Prepare choice of filling.  Lightly flour 2 baking sheets.  Sift flour into a large bowl or onto a flat working surface; make a well in the center.  Break eggs into well.  Add sour cream and 3 tablespoons oil.  Blend ingredients with your fingertips.  Gradually add water, working and kneading mixture into a smooth and pliable dough.  Divide the dough into quarters.  Cover 3 portions with a damp cloth.  On a lightly floured board, roll one portion of dough into a 1/16 inch thick rectangle.  Cut into 3-1/2 to 4 inch circles.  In the center of each circle, place 1 heaping tablespoon filling.  Fold dough in half over filling.  Crimp resulting edge with your fingertips, forming a tight seal.  Repeat process until remaining dough is used, placing pierogis on lightly floured baking sheet.  Bring a large saucepan of water to a boil.  Drop 5 pierogis into boiling water.  Stir gently to prevent them from sticking together.  When water returns to boil, add 5 more pierogis.  Cook savory pierogis 4 to 5 minutes or until they float.  Cook fruit pierogis 10 to 15 minutes. 


Gently remove pierogis from pot; drain in colander.  Pat dry with paper towels.  For savory pierogis, heat oil in a large skillet and sauté pierogis over medium heat until browned on both sides, about 5 to 6 minutes.  Place in large ovenproof serving dish and keep in hot oven until ready to serve.  To freeze boiled pierogis, lightly spray with cooking oil and place in plastic zipped bags.  Makes about 70 pierogis.

Thursday, December 15, 2011

Christmas Kolackys

I only bake kolackys once a year at Christmas time.  They are a bit of extra work, but they are extremely delicious and extremely fattening, so once a year is enough.  I bake a huge batch for my annual cookie exchange with the girls.  I believe they like them (or at least that's what they tell me.)  I also bake a few extra kolackys to give as gifts to friends, coworkers, and family.  I find that food makes great gifts for people for whom you don't know what to get.  Everyone eats, and even if they don't like it, someone they know will.  The gesture is always appreciated, especially if it's homemade.

I started baking on my own when I was about 10 years old.  Chocolate chip cookies were my first baking experience and still one of my faves.  My Irish grandmother married a Polish man and she would make a few Polish dishes.  One of them was to bake kolackys at Christmas.  I don't have her recipe, but I found one that I like even better. (Don't tell Grandma that I said that)  The recipe comes from the Solo Filling can, and I have altered it slightly.  I still use the filling from Solo.  You can visit their website:  http://www.solofoods.com/  for some good recipes.

Here is what you need for making kolackys: makes about 3 dozen
1 cup butter, softened
1 cup cream cheese (8 ounce package), softened. Neufchatel also works.
1 tablespoon milk
1 tablespoon sugar
1 1/2 cups flour
1 egg yolk
1/2 teaspoon baking powder
1 can Solo Pie & Pastry Filling
Powdered sugar for sprinkling

The first step is to beat butter, cream cheese, milk, and sugar in a large bowl until well blended.
Next, beat in egg yolk.  Sift flour and baking soda and stir into butter mixture to make stiff dough.  Cover bowl and refigerate several hours or overnight.  I find it easier to make the dough one day and bake the cookies the next.

Preheat oven to 400 degrees.  Flour working surface and rolling pin very well.  I like to use the Pampered Chef pastry mat.
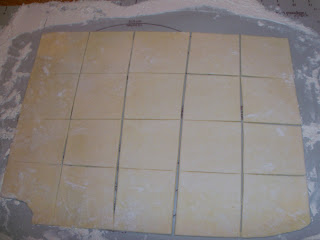
Roll the dough to 1/8" thickness.  Try to keep the shape as rectangular as possible.
Using a pizza cutter or knife, cut into squares about 2 1/2".

Place 1 teaspoon filling in the center of each square.

Bring corners to center and press together making a small square.


Place on baking sheet leaving space  between cookies.  Bake for 10 to 12 minutes until lightly browned.
Cool on wire rack.  Sprinkle with powdered sugar just before serving.  These are just cooling, no powdered sugar yet.  The cookies tend to spread open even though they're sealed.  If you want them to stay closed, place a dab of water on the dough before sealing.  I think they look better with the filling showing.
They also look a little prettier when covered with powdered sugar.

These cookies freeze well, just be sure to sugar them after you remove them from the freezer.

Merry Christmas!

Friday, December 9, 2011

Oven Fries

Last night, I tried a new side dish with tacos... oven fries seasoned with taco seasoning.  It's a recipe that I saw on Rachael Ray's show, and it sounded delicious to me.  I love fries, but not the fat and salt.  Potatoes are a great source of potassium which is needed for good heart health.  This recipe bakes the fries and uses alternative spices.  It's a little time consuming cutting the potatoes into thin fries.  I use a mandolin slicer that makes quicker work of it.  I suppose that you can use precut frozen fries.

All you need to do is to toss the sliced potatoes in some olive oil, place on a baking sheet, and sprinkle with seasonings and bake.  Rachael Ray recommends using a cooling rack on top of the baking sheet to get the fries crispy.  I don't think it's necessary, as I have tried it both ways.  You can change the seasonings to your taste.  I have made them with ranch seasoning and taco seasoning and like them both.

I also microwave potatoes for 5 to 7 minutes on high to reduce oven cooking time.  I'll nuke them first then toss them with oil and season them.  Place the fries on the baking sheet.  After 25 minutes, take them out of the oven and turn them over so they bake evenly.  Then bake them 20 - 25 minutes longer.

Try your own variations and let me know how they turn out.  I think I'm going to try garlic parmesan fries next. Yum!


Ranch Oven Fries

Ingredients:

6 medium Idaho potatoes

Extra virgin olive oil

1 – 2 teaspoons Auntie Jean’s Low Sodium Ranch Blend

Yield: 6 servings

Preparation:

Preheat oven to  400 degrees.  Arrange cooling/wire racks over 2 baking sheets.  Peel potatoes and cut into thin fries, less than ¼ inch thick.  In a large bowl, dress fries very lightly with olive oil and ranch seasoning.  Arrange fries in single layer on wire racks.  Place in oven and bake for 50 to 60 minutes until crispy.


Monday, December 5, 2011

Lemon Pepper Pork Chops

As I have mentioned before, while growing up, I wasn't exposed to a great variety of foods.  My mom wasn't fond of pork, so the only time I had it was if I was dining at a friend's house.  That almost never happened because my mom thought it was rude to dine with other families.  She told me that dinner was a family meal and I wasn't allowed to eat dinner with them.  I remember one time my friend's mother called my mom and practically had to beg her to let me stay for dinner.  To this day, I still don't understand my mom's rule.

That being said, whenever I had the opportunity to try pork, I didn't like it.  I think that is because it is difficult to cook it correctly.  I am still working on that myself.  The pork chops or roast usually turn out dry and overcooked.  I have asked several people who cook pork why this is and I can't get a definite answer.  I am not one to be deterred by failure; I simply keep trying to get it right.

I found a pork chop recipe that I like and the pork turns out moist.  Even my mother likes it, so I'll call it a success.  It's simple to make.  The most difficult task for me is unwrapping the chops from the foil.  If you can master that, you'll find this a piece of cake.

I like the lemon pepper and garlic.  I suppose that you can change the spices to your liking.  Enjoy!


LEMON PEPPER PORK CHOPS

Ingredients

  • 4 pork chops
  • 1 tablespoon Auntie Jean’s Low Sodium Lemon Pepper Blend
  • 8 teaspoons butter
  • 8 teaspoons olive oil
  • 4 teaspoons Worcestershire sauce

Directions

1.     Preheat oven to 400 degrees F (200 degrees C).

2.     Tear off a generous square of tin foil for each chop, enough to wrap and seal completely. Coat both sides of each chop with lemon pepper.

3.     Put 1 teaspoon butter and 1 teaspoon olive oil in the middle of each square of tin foil. Put the peppered chops on top of the butter and oil. Put 1 teaspoon of butter and 1 teaspoon olive oil on top of each chop. Add 1 teaspoon Worcestershire sauce over the top of each chop. Wrap each chop tightly and place on middle rack of oven. Bake for 35 minutes.


Wednesday, November 30, 2011

Frozen Pineapple Ice Cream Sandwiches

I love ice cream but I rarely eat it because it's so high in fat.  Recently, I have been trying harder than ever to reduce my fat intake.  As a result, I've lost a few pounds (yay!) and discovered and rediscovered yummy recipes.  As I was searching online for low fat desserts to make for Thanksgiving, I came across this recipe for Frozen Pineapple Ice Cream Sandwiches.  Pineapple and ice cream together?  Jackpot!  It's a very simple recipe; I think the most difficult part is wrapping the sandwiches with plastic wrap.  For those of you who don't like (or aren't any good at) baking, this one's for you.

My family enjoyed these sandwiches at Thanksgiving (along with apple pie and chocolate cheesecake).  There were enough sandwiches leftover for me to enjoy later.  I'm going to make some more to keep in my freezer for everyday snacking.  I intend to try them with different flavors.  This week, I'm going to make banana flavored ice cream by using banana in place of pineapple and banana cream pudding in place of the vanilla pudding.  I'm sure you can use just about any fruit, you just need to blend it in a blender or food processor.  The flavor combination that I'm most looking forward to trying is blueberry cheesecake.  That is my favorite flavor from my favorite ice cream shop, Sherman Dairy in South Haven, Michigan.  www.shermanicecream.com.  If you're familiar with southwest Michigan, you've probably had their ice cream.  Unfortunately, they're closed for the winter.  They'll open again in March... I see a road trip in my future.  If you ever have the chance for Sherman Dairy, be sure to stop for some fantastic ice cream.


FROZEN PINEAPPLE ICE CREAM SANDWICH

Ingredients

  • 1 (16 ounce) container low fat frozen whipped topping, thawed
  • 1 (20 ounce) can canned crushed pineapple, drained
  • 1 (1.4 ounce) package fat free, sugar free instant vanilla pudding
  • 36 graham cracker squares

Directions

1.     In a large bowl, beat together the thawed whipped topping, crushed pineapple and vanilla pudding mix for 2 minutes. Spread pineapple mixture 1/2 inch thick between two graham crackers. Wrap gently in plastic wrap and freeze for 2 hours.


Sunday, November 27, 2011

My First Thanksgiving Turkey

I have lived for 43 years and have never had the pleasure of preparing a Thanksgiving turkey (or a whole turkey for any occasion for that matter.)  When I was a child, my grandmother was always the one who cooked the turkey for us, and my grandfather or one of my uncles would carve it.  After my grandma stopped cooking for the holidays, the task passed to my aunts or my mom.  My grandmother still hosts the holidays at her house. As she is wheelchair-bound, it's easier for her to stay put and for her family to bring the party to her.  We happily oblige her for every holiday.

This Thanksgiving, my sister and I were doing the party planning.  When we asked the family what they would like to contribute, no one volunteered to bring a turkey so I knew it fell to us.  My mom bought a 21 pound bird for our gathering of 18 guests, several of which were children.  I began my online search for a turkey recipe; the one that caught my eye was "Juicy Thanksgiving Turkey".  I thought I'd give that one a try because it sounded simple enough and had received 5 star reviews from users.  I modified the recipe to reduce the sodium content.  I also was glad to find that the recipe was gluten free as one of my cousins has a gluten allergy, it was perfect.

I know most people never would try a new recipe for a party, but it's something that I do all the time.  I guess you can consider me a brave cook.  I'd prefer that to a stupid one.  Since I've never made a turkey, the recipe had to be new... at least new to me.  Here it is.


JUICY THANKSGIVING TURKEY

Ingredients

  • 2 tablespoons dried parsley
  • 2 tablespoons dried rosemary
  • 1 teaspoon sage
  • 1 teaspoon  thyme
  • 1 tablespoon Auntie Jean’s Low Sodium Lemon Pepper Blend
  • 1 (15 pound) whole turkey, neck and giblets removed
  • 2 stalks celery, chopped
  • 1 orange, cut into wedges
  • 1 onion, chopped
  • 1 carrot, chopped
  • 1 (14.5 ounce) can low sodium chicken broth
  • 1 (750 milliliter) bottle champagne

Directions

1.     Preheat an oven to 350 degrees F (175 degrees C). Line a turkey roaster with long sheets of aluminum foil that will be long enough to wrap over the turkey.

2.     Stir together the parsley, rosemary, sage, thyme, and lemon pepper in a small bowl. Rub the herb mixture into the cavity of the turkey, then stuff with the celery, orange, onion, and carrot. Truss if desired, and place the turkey into the roasting pan. Pour the chicken broth and champagne over the turkey, making sure to get some champagne in the cavity. Bring the aluminum foil over the top of the turkey, and seal. Try to keep the foil from touching the skin of the turkey breast or legs.

3.     Bake the turkey in the preheated oven for 2 1/2 to 3 hours until no longer pink at the bone and the juices run clear. Uncover the turkey, and continue baking until the skin turns golden brown, 30 minutes to 1 hour longer. An instant-read thermometer inserted into the thickest part of the thigh, near the bone should read 180 degrees F (82 degrees C). Remove the turkey from the oven, cover with a doubled sheet of aluminum foil, and allow to rest in a warm area 10 to 15 minutes before slicing.
      I used a plastic bag for the turkey instead of covering with foil.  It seemed to work ok except that parts of the bag stuck to the turkey.  Next time, I will simply use a covered roasting pan.  The other change I made was to use ginger ale instead of champagne as I am not a fan of wine.  The turkey turned out pretty moist and everyone said that it tasted delicious.  Even my mom said it was delicious, and she rarely says more than, "It was fine." or "It was good."  I consider that a success.
     The vegetables used in the stuffing were edible but extra seasoned.  Next time, I intend to use them to make a turkey soup.  I'll start that with some leftover turkey stock, leftover turkey meat, and the well-seasoned vegetable stuffing.  Then I might add some rice or pasta and some more veggies.  I find that soup is a great way to use leftovers.
      Of course, you need gravy to accompany the turkey.  I don't often make gravy, and I've never been good at it but I had to try.  Again I went online to find a simple recipe that hopefully I would not screw up.  I found and easy  recipe and it turned out well too.  I used the pan drippings from the cooked turkey which were comprised primarily of sodium free chicken stock and ginger ale.  I was worried that they might taste strange in gravy, but I was thankfully wrong.
Here is the gravy recipe.  Happy Thanksgiving!
EASY TURKEY GRAVY
Ingredients
  • 2 cups low sodium turkey stock with pan drippings
  • 1/2 teaspoon Auntie Jean’s Low Sodium Poultry Blend
  • 1/4 teaspoon black pepper
  • 1/8 teaspoon garlic powder
  • 1/2 cup milk
  • 3 tablespoons all-purpose flour
Directions
1.     Bring the turkey stock to a boil in a large saucepan. Season with poultry seasoning, pepper, and garlic powder. Reduce heat to low, and let simmer.
2.     Warm the milk in the microwave, and whisk in the flour with a fork until there are no lumps. Return the gravy to a boil, and gradually stir in the milk mixture. Continue to cook, stirring constantly, for 1 minute, or until thickened. Be careful not to let the bottom scorch.


Tuesday, November 22, 2011

Buffalo Chicken Fingers

American fare at many restaurants will often include Buffalo Chicken Wings.  They are delicious but so bad for us, mostly because of their high fat content (40 or 50 grams per serving).  I thought that there must be a way to reduce the fat and the sodium but still be tasty.  I looked up a few recipes online and adjusted them until I found one that I liked.  I think that this recipe reduces the fat to 5 grams or less per serving. 

Chicken fingers are fairly simple to make. You can even make them ahead and freeze them to be reheated later for a super quick meal.  I often use the leftovers to make chicken salad or chicken wraps.  I sometimes serve the chicken fingers with a homemade low sodium ranch dressing.  I have included that recipe here as well.


BUFFALO CHICKEN FINGERS 


3 – 4 Boneless, skinless chicken breasts, cut into strips

¼ cup flour

1 teaspoon garlic powder

1 teaspoon cayenne

½ cup Matzo Meal

½ cup skim milk

3 tablespoons unsalted melted butter or spray oil


Preheat oven to 400 degrees and spray baking sheet with cooking spray.  In plastic zip bag, mix flour, ½ teaspoon garlic powder, and ½ teaspoon cayenne.  In a shallow dish, mix Matzo Meal, ½ teaspoon garlic powder, and ½ teaspoon cayenne.  Pour milk into a separate shallow dish.  Place chicken strips in zip bag with flour mixture and shake until coated.  Dip chicken strips in milk and then coat in Matzo Meal mixture.  Place chicken strips on baking sheet and brush with melted butter or spray oil.  Bake for 8 minutes and remove from oven.  Turn strips over and brush with butter/oil and bake 8 minutes longer.
RANCH DRESSING 
Ingredients:
1 tablespoon Auntie Jean’s Low Sodium Ranch Blend*
1 cup low fat mayonnaise/ low fat yogurt
1/4 cup milk/ buttermilk

In bowl, combine all ingredients and mix well.

*NOTE:  Please contact me if you would like to purchase a bottle of Auntie Jean's Low Sodium Ranch Blend for $5 per bottle.  You may substitute it with: 1/4 teaspoon garlic powder, 1/4 teaspoon onion powder, 2 teaspoons dried parsley, 1/2 teaspoon dried dillweed, and 1/8 teaspoon white pepper.

Wednesday, November 16, 2011

Everybody Loves Sloppy Joes

Growing up, there were many foods that I didn't like to eat.  Even now as an adult, I am a fairly picky eater (as my sister, Karen will attest.)  I wasn't fond of Sloppy Joe's, and my mom didn't make them too often which was fine with me.  Our dinner staples included spaghetti, hamburgers, tacos, meatloaf, pizza, tomato bread, and Chicken Kiev. 

As I grew older and started dining out more, I was able to expand my culinary palate.  I enjoy trying new dishes to see what I like. I would find recipes for some foods that I liked in restaurants and make them at home.  After I was diagnosed with high blood pressure, I needed to find new recipes that are low sodium and low fat.  If you use something store-bought like Manwich, it adds 410mg of sodium per 1/4 cup. http://www.conagrafoods.com/consumer/brands/getBrand.do?page=manwich

  One of the new recipes that I found was for sloppy joes; I thought I'd give it a try even though I didn't like them.  As it turns out, I do like sloppy joes... at least this recipe.  For my convenience in making sloppy joes, I made a low sodium spice blend.  Now it's easier than ever to make a quick and tasty dinner.


Sloppy Joe


1 Pound Ground meat

3/4 C Salt Free Ketchup*

1/4 Cup water

3 Tablespoons Auntie Jean’s Low Sodium Sloppy Joe mix**

1/4 Cup chopped onions (optional)

1/4 Cup chopped green peppers (optional)


In large skillet, brown meat, onions and peppers, then drain.  Add ketchup, water, and Sloppy Joe mix.  Simmer 15 minutes. Serve on hamburger buns, with pita bread, or tortillas.  Yield 8-10 servings.

*Note: Heinz makes a no salt ketchup.  http://www.heinzketchup.com/

**Please contact me if you'd like to buy some Auntie Jean's Low Sodium Sloppy Joe Blend for $5 per bottle:  auntiejeans@yahoo.com.  If you'd like to make the recipe without it, you can substitute 1/2 teaspoon garlic powder, 1 teaspoon prepared yellow mustard, 1 teaspoon minced garlic, 1 tablespoon brown sugar, and 1/8 teaspoon black pepper.

Monday, November 14, 2011

Homemade Chips and Salsa

I love snacks, but there are very few store-bought snacks that are good for you.  Tortilla chips and salsa are so yummy when you order them at a Mexican restaurant, but they are hardly good for you with all the salt and oil.  I even enjoy the jars of salsa from the grocery store, but again, they are high in sodium.  Actually, my all-time favorite salsa was made by my cousin, Bob.  When he and his wife, Deanna were married, they gifted guests with baskets of goodies, one of which was the delicious homemade salsa.  I should have asked for the recipe, but never did.  It did inspire me to try making my own salsa.  It's not hard to do; just mix some chopped tomatoes and onions with some spices and lime juice and let marinate awhile.  When you make low sodium salsa, just leave out the salt.  It's just as delicious because there are so many other spices that you hardly notice the absence of the salt.

You always need some good tortilla chips to go with that salsa, but finding chips in the store that are low salt and low fat can prove to be difficult.  Thanks to my brother, Tom, I learned that you can bake your own tortilla chips.  Recently, he was hosting a party where he served homemade tortilla chips.  He baked them because my parents, his in-laws, and I are on sodium restricted diets and he wanted to serve something that we could eat.  When he told me how easy it was, I tried it myself.  Now chips and salsa have become my go to snack.  Try it yourself!


SIMPLE SALSA 

1 can (14oz) diced tomatoes

½ cup finely chopped onion

1 tablespoon lime juice

1 tablespoon Auntie Jean’s Low Sodium Salsa Blend*

Combine all ingredients in bowl. Chill for one hour and serve with tortilla chips.

*If you need some Auntie Jean's Low Sodium Salsa Blend, I sell it for $5 per 1.5 ounce bottle.  Just let me know.  If you want to make it using your own spices, replace it with: 1/4 t cayenne, 1/2 t onion powder, 1/2 t dried cilantro, 1/2 t red pepper flakes, 1/2 t garlic powder, and 1 clove crushed garlic.

BAKED TORTILLA CHIPS
Ingredients:
8 7-inch low sodium corn tortillas
Vegetable oil 
Preheat oven to 400 degrees.  Brush or spray* tortillas with oil on both sides. 

Using pizza cutter, cut tortillas into 6 or 8 triangles per tortilla and spread onto cookie sheet. 


Bake for 8 to 10 minutes until crispy.  Store in plastic zip bag to keep fresh.
*Note: spraying oil on tortillas adds less fat.  You can put oil in a clean standard spray bottle.  I use the Kitchen Spritzer by Pampered Chef.  http://www.pamperedchef.com/ordering/prod_details.tpc?prodId=610&catId=123&parentCatId=123&outletSubCat=

Friday, November 11, 2011

Sweet and Sour Chicken

One of my 97 year old grandmother's favorite dishes is Sweet and Sour Chicken.  She's is wheelchair bound and lives alone.  She can't see very well and doesn't cook much for herself (thankfully, otherwise I fear she might burn down her house.)  I bring her leftovers nearly every week so she can still eat homemade meals.  She simply reheats them in her microwave.  She tells me how grateful she is to have the leftovers, but I feel that I should be doing more for her.  Luckily, she has many family members who live close to help her with laundry and shopping.  As far as I know, I'm the only one who brings her prepared homemade meals.

I love Sweet and Sour Chicken almost as much as my grandma so I make it often.  I discovered a low sodium recipe that I love.  I was surprised at how easy it is to make.  Even my 4 year old niece helps me sometimes when I'm babysitting her.

The sauce can be made by itself to be used later or with other dishes.  It does not freeze well, so you can't make it too far in advance of using it.


SWEET & SOUR CHICKEN

Ingredients

  • 1 pound skinless, boneless chicken breast meat - cubed
  • 2 tablespoons vegetable oil
  • 1/2 cup sliced green bell pepper
  • 1/2 cup sliced red bell pepper
  • 2 tablespoons cornstarch
  • 1 (20 ounce) can pineapple chunks, juice reserved
  • 1/3 cup white vinegar
  • 2 teaspoons vegetable oil
  • 2 tablespoons no salt ketchup
  • 3 tablespoons brown sugar

Directions

1.     Brown chicken in oil in a large skillet over medium high heat. Add green bell pepper, red bell pepper and stir fry for 1 to 2 minutes.

2.     In a small sauce pan over medium-low heat, whisk cornstarch and vinegar. Add oil, pineapple juice, ketchup, and brown sugar.  Whisk constantly until heated through.

3.     Add pineapple chunks and sauce to chicken and heat.  Serve with cooked rice.